9.29.2014

wreath gone batty :: introducing toni from designs flair...

Last month, I shared a tutorial for just about the easiest possible DIY autumn wreath. As October is quickly approaching, Halloween decor and celebrations have been on my mind. When I saw the new Toni From Designs Trick or Treat flair, I knew that using them for a wreath banner would be the perfect addition to our entry decor! This project is also featured on Toni's blog today. I hope you'll pop over and check it out...

I wanted to make something with dimension so found a bat cut file in the Silhouette online store and cut ten shapes: five one size and five slightly smaller to layer on top. First, I strung all of the larger bats together using orange and white baker's twine to create the base of my banner.


Second, I used a bone folder to add creases to the front of each of the smaller bats. Lining up the tops of the heads, I attached the two sizes together with double sided adhesive and bent the wings of the front shapes up to add a three dimensional effect.

Selecting five of the Trick or Treat flair, I added each to the centers of the bats using double sided foam tape. The flair are flat back and super lightweight. Perfect for this project! I accented three of the bats with silver glitter stars for a bit of sparkle.

I love how this project came together! Our front door will welcome the trick or treaters in our new neighborhood in style!

Toni will be releasing a new awesome flair design in her Etsy shop every Monday and will reveal the designs on her blog, Instagram, Twitter and Pinterest.

9.17.2014

week 34: at home musings...

Week 34 is one of my favorite PL spreads ever for mainly one reason...that black and white photo of my three kids. Getting all three in the frame and looking at the camera is a feat of epic proportion. While it is simply an iPhone photo and Amalia looks just a bit, well, squished, they are all accounted for and looking at the camera. Winning! These pages were made using the beautiful September Citrus Twist Pocket Life Kits.


Simple, at home summer memories recorded here. My favorite journaling card on this page is "Jack-isms". I love have an outlet for these little right now glimpses.


Backyard fun, bathtime and a favorite refreshment...


I'll be posting again this week using the same kits to scrap G's first day of Pre-K (!!!), pocket style.

9.10.2014

reflections on my 30s :: on cherry street 'reflections' kit

I'm sharing another page in my 30s album today, this time celebrating the role of wife. The On Cherry Street kit: Reflections had some perfect elements for this page. My husband and I met on a blind date in July of 2006 and have been together every day since. Since we were married in 2009, it's been a wonderful whirlwind of job changes, growing our family, travel and buying our forever home. There is no one else I could imagine at my side. He's my lobster.


I used two cards from the kit for this page. The top right "follow your heart" and then cut out part of another for the bottom left "right music" quote. John Legend's All of Me is a ballad that I've fallen in love with recently and is beautifully fitting. I stamped the "In love with" prompt to accent my journaling on the top right. Here is a close up of the music card:


Supplies: On Cherry Street kit, Reflections // Hedgehog Kiss stamps, Sweet Stamp Shop // Shimelle patterned papers, American Crafts // watercolor crayons // water pen // Twinkle Sweet Dots, V's Sweet Ideas

fun at the county fair...

I recall going to fairs as a child, seeing the farm animals and taking a few rides. Attending the county fair near our new home made our summer bucket list. As the date approached, George began to spot the television commercials and flyers and asked to make the trip. We started a countdown to the fair and talked about some of the things we might see. Admittedly, when I happened upon Jill's blog post about the potential for disaster in taking three young children to such an event, I nearly ditched the idea. Instead, we saw the fantastic weather forecast, caught George's excitement, packed up a million snacks (and just slightly less than a million dollars) and off we went.

I learned a few things that day:
  1. Arrive early. As in, 30 minutes or more before the gates open. We planned it this way, hoping it would pay off and were spot on. Even though we went on a Saturday, the second to last fair day, getting to the lots prior to the gate opening meant we were able to park in the closest lot and had a very short wait once the Star Spangled Banner was finished and the gates flung wide.
  2. Advance order your tickets, if available. We did not do this simply because we weren't aware of the option. For our fair early bird tickets, for both admission and rides, can be purchased the week before the opening day at a discounted rate.
  3. Wear comfortable shoes. While our county fairgrounds were meticulously maintained and very clean, we covered a LOT of ground that day. Sneakers were a must. The people sitting on benches rubbing their tired feet from $1 flip flops or high heels (why???) would have been wise to think of this ahead of time.
  4. Pack snacks for the kids. Lots of snacks. And maybe lunches. If your kids are picky eaters, bring your own food. Fair food is expensive and you do not want to waste $8 on a mini hot dog that will get a mere lick before being discarded. Save that $8 for more rides or fried cheescake on a stick for yourself.
  5. Bring your patience. Fairs are large, loud and crowded. Kids can get easily overwhelmed and overstimulated by large spaces, noise and crowds. Remember this. Take deep breaths, regroup, think about what it all looks like from the perspective of your littles.
We ended up having an excellent family day with few very minor, and very normal, kid behaviors. The boys loved pretty much everything about the day. Amalia sat back and just took it all in then passed out for a long nap in the stroller. We cannot wait to go back next year. With our advance tickets, of course!


9.09.2014

pl 2014: weeks 24, 28 and a bonus insert for 29

Today I'm sharing some of my favorite recent layouts in our family album. All were made from the August Citrus Twist Pocket Life kits, featuring the gorgeous Shimelle paper pad...love!!!


Week 24: World Cup 2014, time outside, projects and a visit with Papou....

Our yard in bloom, well visit, lacrosse, building and a little decorating. The "pretty things" quote is on a glassine bag that hold my journaling about what's been done so far in my scrap room...

Week 28: Never having picked up my dSLR this week, this spread is made entirely of iPhone photos and I used two Design F pages to best accommodate the 3x4's.

Breakfast with dinosaurs, sushi, new sounds and textures, coffee 'me time' and a pool day...

A power outage, art by Jack, man in trees (!!), and frozen custard! I am loving the look of white cards with typewriter journaling and simple embellishements.

Detail on some of my favorites...

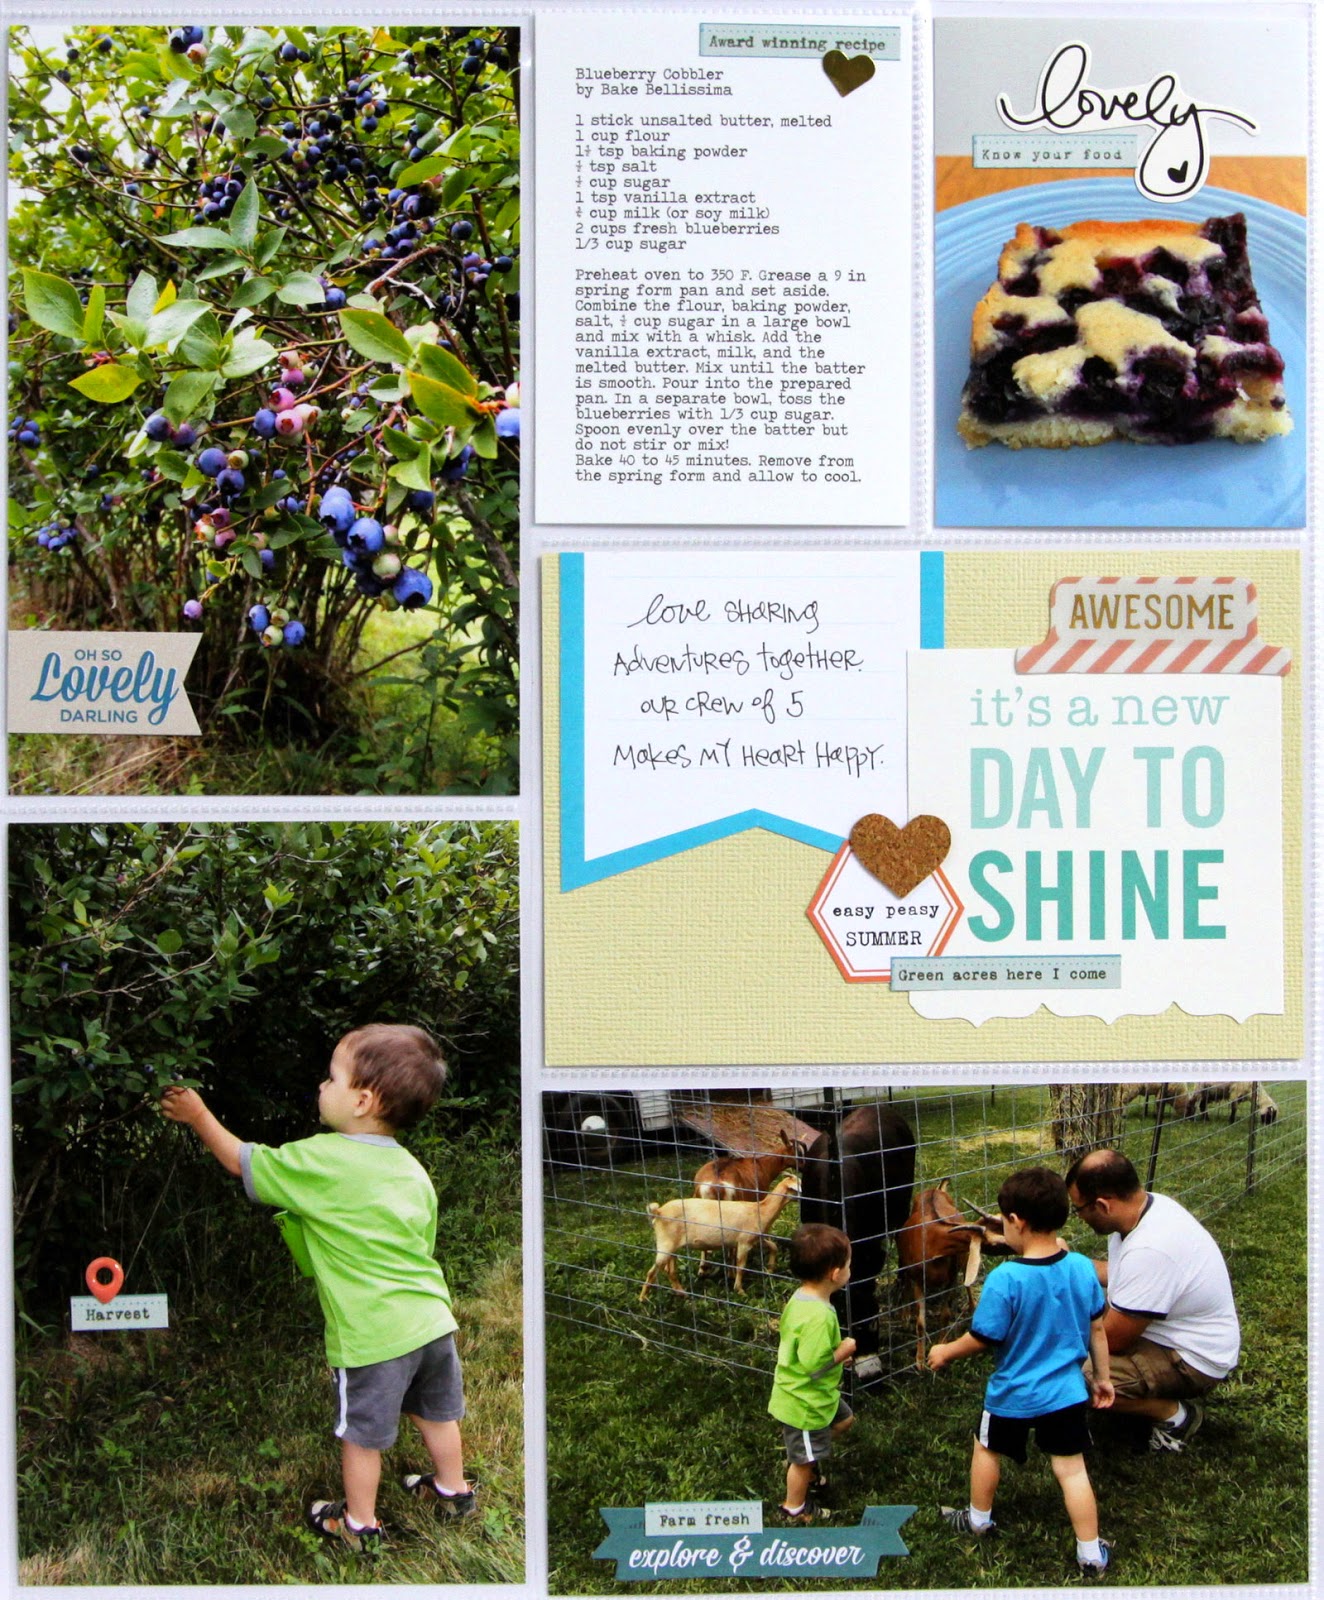
Week 29 Insert: Our first time picking blueberries...

Loved this local farm with u-pick berries. The berry crop was incredible!

They even had farm animals for the kids to pet and feed. At home I found a recipe for an incredible Blueberry Cobbler and had to include it for future years...


9.05.2014

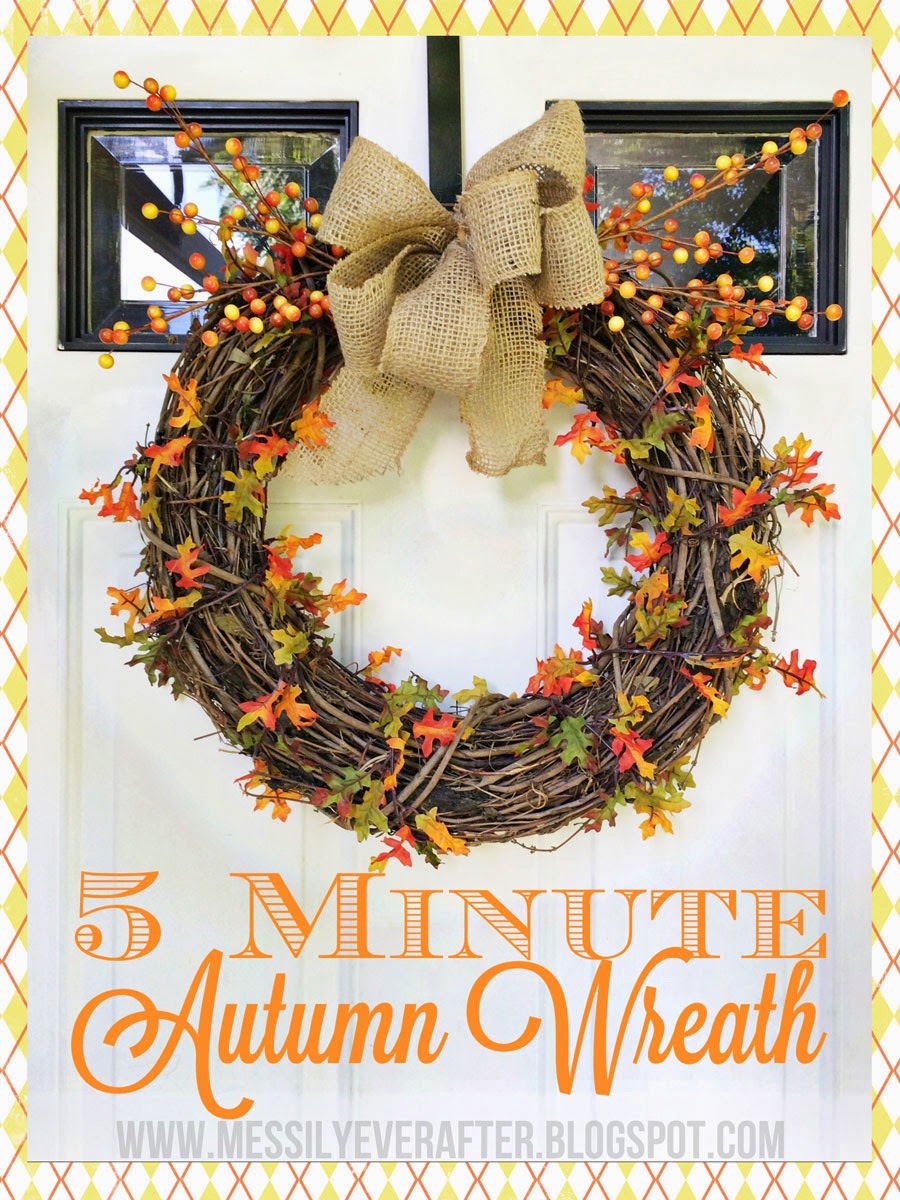
five minute autumn wreath :: a tutorial

Last week I made a fabulous new wreath for our front door. I saw the design on Pinterest, clicked immediately over to The 36th Avenue blog and read the instructions. Within two days, I had gathered my supplies and the wreath took shape. It turned out even better than I imagined! Sadly, I'm not sharing that project here today. You see, I was all excited to decorate for fall on Tuesday, took out the wreath, hung it on our front door, shut the door...well, no. I couldn't shut. the. door. The wreath is too thick to fit between the storm door and our interior door. Who would have even thought to measure for that? Ahem. So, that lovely wreath now hangs in our kitchen where I see it 100+ times a day. See, not a fail at all!

Today, I looked at our unadorned white door and grumbled. It is September. Autumn decor must be displayed. It's my favorite season. Everything apple and pumpkin and lovely warm colors! So, off to the craft store I went to try again and on the cheap. I saw one ready made wreath I loved but at $50? No, not happening. Armed with a coupon and keeping an eye out for sale signs, I picked up bits here and there, brought them home and got to work. FIVE MINUTES later, I was done and happy. You read that right. 5 minutes.


I made the wreath using very simple supplies from AC Moore, the nearest craft store to our home. Prices will vary at other stores but every big box craft store will have similar supplies on hand right now, likely at a discount. I did not pay full price for one piece of this project:

You will need:
Grapevine wreath // $2.50 (regular $4.99, used 50% Michael's mobile coupon)
Leaf Garland to wrap around // $3 (on sale, regular $5.98)
Berry Picks x 4 // $0.50/ea (on sale, regular $1.00)
Burlap bow // $3.59 ready made in the floral design section (on sale, regular $5.99)

Instructions:
1) Wrap the garland around the wreath, attaching it to the back with wire or pins. Or, since my garland had lops at either end, I just hooked it on a cut piece of the grapevine on the back and started wrapping, then did the same for the ending.
2) Add bow with wire. Mine came with a tan pipe cleaner as a stabilizer so I just twisted that around the wreath. 
3) Add two berry picks to either side of the bow. Just stick them into the dense grapevine.
4) Hang your finished wreath.

Totally do-able in 5 minutes while your infant eats puffs next to you and your toddler runs circles around your feet with a toy truck, yelling, "beeeeeep, beeeeeep!" Oh wait, is that just my house?

9.04.2014

reflections on my 30s // on cherry street: reflections

I have had the honor of designing for Sweet Stamp Shop this month using the On Cherry Street kit special release, Reflections. The Reflections kit is geared toward taking your projects deeper, taking a look at yourself or sharing thoughtful words with others. Though the kit works great for card makers and traditional scrappers, I've been using it in my favorite way - pocket pages.

As soon as I has the kit stamp set and cards in my hands, I knew what project I'd finally begin. I'm hovering on the brink of a milestone birthday and have been thinking about how I want to document all of the changes, the new roles I've taken on in the past decade. The best decade. Enter this mini album. I'll be sharing the full album in separate posts here on the blog. Today, I'm focusing on the image in the mirror (top left card from Reflections)...


The kit stamp set has a number of prompts that I know I'll use time and again. Here, I stamped them on a striped patterned paper, journaled and layered that over a Reflections card...


Thank you for taking a peek today! I'll share another page from this album next week, here on my blog. I hope you'll pop by the Sweet Blog through the month as the rest of the team continues to post their kit projects and for everyday stamping inspiration!

Supplies used: On Cherry Street kit: Reflections // Baking Love stamp set (retired): Sweet Stamp Shop // Hedgehog Kiss stamp set: Sweet Stamp Shop // Shimelle patterned paper: American Crafts // Kelly Purkey Alphabet Stickers: Simon Says Stamps // Metallic Glitter Sweet Dots: V's Sweet Ideas // Gold Star: Studio Calico
Related Posts with Thumbnails