Showing posts with label autumn. Show all posts

10.18.2014

cut file saturday: link and win!

Happy Saturday! Today on the Paper Issues blog the first monthly cut file is available as a free download. Each month a new cut file will be posted, and with it, a chance to win free product for using the cut in your own creative project. This month, play along, link up on the "Cut It Out" blog post link up and you'll be entered for a chance to win the November Paper Issues Swag Bag!

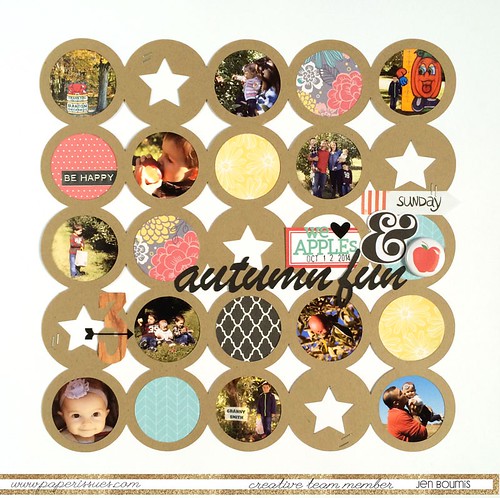
Here is my 12x12 layout using the cut file:

JenBoom_PIOct14CutFile
To create the layout I cut the full size Silhouette file from kraft paper then, chose several patterned Home + Made papers and cut those so that the circle would match up and pop right in the open spaces. Next, I printed several photos from our recent trip to the apple orchard at approximately 2" square. Using a 2" circle punch, I punched out each photo and added them in behind the cut file. The title is also a Silhouette cut created using a brush script font. The embellishments are a mix from my stash and the September PI Swag Bag, along with a piece of flair by Toni From Designs.

I hope this inspires you to scrap your own creation! Be sure to link back on the "Cut It Out" post for a chance to win.


10.15.2014

woodn't you know, it's fall? :: an issue...

Hello all! The past few weeks have been a whirlwind of projects, fall activities, lovely autumn weather (my favorite) and family time. I have not shared here as I'd hoped but, have a line up of projects ready to post starting...now! Paper Issues started a brand new Issue and link party this Monday, themed for fall, using wood items, wood grain - any or all! You can read more about the issue here.

I'm linking up today with a pocket layout documenting our family trip to the pumpkin patch. This gorgeous place is just minutes from our home and provided such a fun afternoon. I have more photos and details that I'll be scrapping but, wanted to get to these few right away. I've used mostly Fancy Pants True Friend papers and MME Jubilee embellishments to create this page.


I hope you'll create a project of your own to join the Issue linky party! Need some new fall scrappy goodies? Use my code for 20% off your entire Paper Issue order...

9.29.2014

wreath gone batty :: introducing toni from designs flair...

Last month, I shared a tutorial for just about the easiest possible DIY autumn wreath. As October is quickly approaching, Halloween decor and celebrations have been on my mind. When I saw the new Toni From Designs Trick or Treat flair, I knew that using them for a wreath banner would be the perfect addition to our entry decor! This project is also featured on Toni's blog today. I hope you'll pop over and check it out...

I wanted to make something with dimension so found a bat cut file in the Silhouette online store and cut ten shapes: five one size and five slightly smaller to layer on top. First, I strung all of the larger bats together using orange and white baker's twine to create the base of my banner.


Second, I used a bone folder to add creases to the front of each of the smaller bats. Lining up the tops of the heads, I attached the two sizes together with double sided adhesive and bent the wings of the front shapes up to add a three dimensional effect.

Selecting five of the Trick or Treat flair, I added each to the centers of the bats using double sided foam tape. The flair are flat back and super lightweight. Perfect for this project! I accented three of the bats with silver glitter stars for a bit of sparkle.

I love how this project came together! Our front door will welcome the trick or treaters in our new neighborhood in style!

Toni will be releasing a new awesome flair design in her Etsy shop every Monday and will reveal the designs on her blog, Instagram, Twitter and Pinterest.

9.05.2014

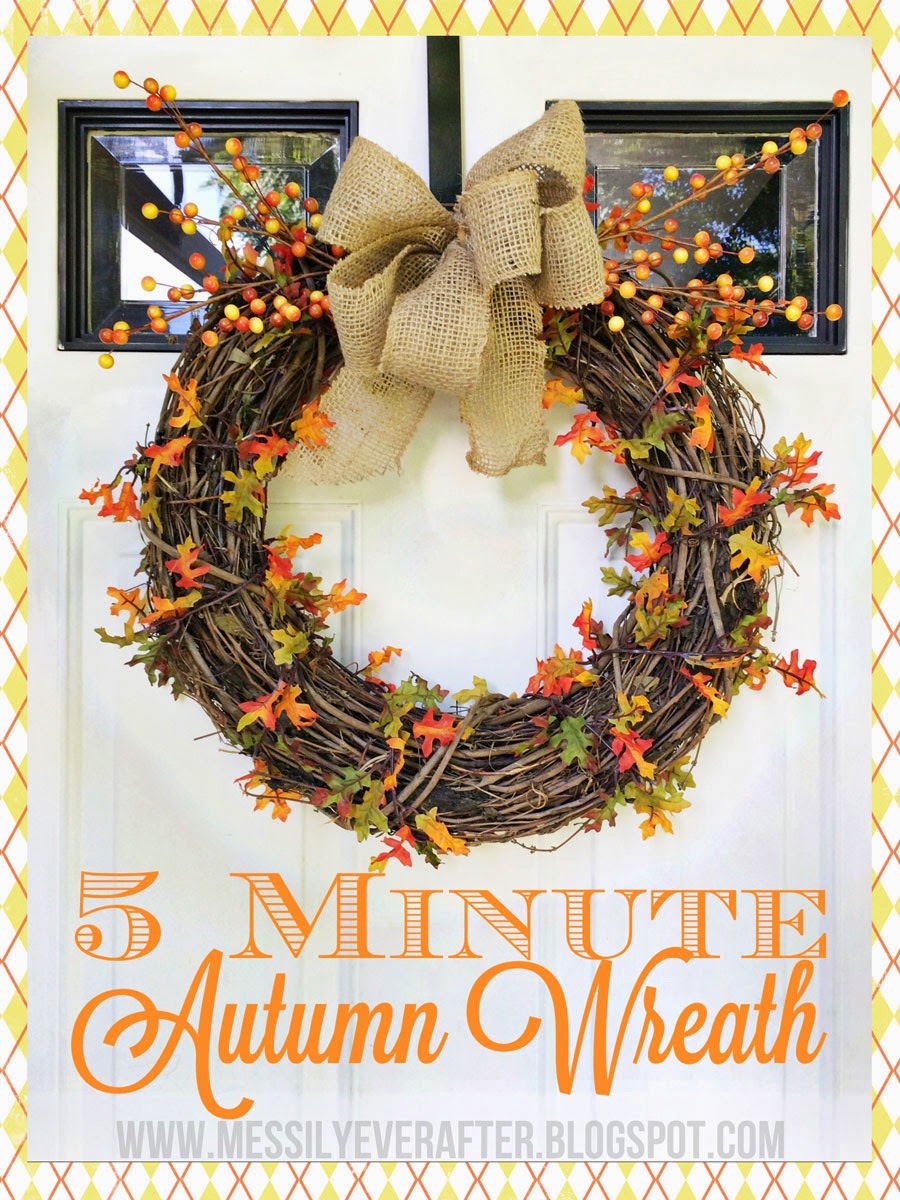
five minute autumn wreath :: a tutorial

Last week I made a fabulous new wreath for our front door. I saw the design on Pinterest, clicked immediately over to The 36th Avenue blog and read the instructions. Within two days, I had gathered my supplies and the wreath took shape. It turned out even better than I imagined! Sadly, I'm not sharing that project here today. You see, I was all excited to decorate for fall on Tuesday, took out the wreath, hung it on our front door, shut the door...well, no. I couldn't shut. the. door. The wreath is too thick to fit between the storm door and our interior door. Who would have even thought to measure for that? Ahem. So, that lovely wreath now hangs in our kitchen where I see it 100+ times a day. See, not a fail at all!

Today, I looked at our unadorned white door and grumbled. It is September. Autumn decor must be displayed. It's my favorite season. Everything apple and pumpkin and lovely warm colors! So, off to the craft store I went to try again and on the cheap. I saw one ready made wreath I loved but at $50? No, not happening. Armed with a coupon and keeping an eye out for sale signs, I picked up bits here and there, brought them home and got to work. FIVE MINUTES later, I was done and happy. You read that right. 5 minutes.


I made the wreath using very simple supplies from AC Moore, the nearest craft store to our home. Prices will vary at other stores but every big box craft store will have similar supplies on hand right now, likely at a discount. I did not pay full price for one piece of this project:

You will need:
Grapevine wreath // $2.50 (regular $4.99, used 50% Michael's mobile coupon)
Leaf Garland to wrap around // $3 (on sale, regular $5.98)
Berry Picks x 4 // $0.50/ea (on sale, regular $1.00)
Burlap bow // $3.59 ready made in the floral design section (on sale, regular $5.99)

Instructions:
1) Wrap the garland around the wreath, attaching it to the back with wire or pins. Or, since my garland had lops at either end, I just hooked it on a cut piece of the grapevine on the back and started wrapping, then did the same for the ending.
2) Add bow with wire. Mine came with a tan pipe cleaner as a stabilizer so I just twisted that around the wreath. 
3) Add two berry picks to either side of the bow. Just stick them into the dense grapevine.
4) Hang your finished wreath.

Totally do-able in 5 minutes while your infant eats puffs next to you and your toddler runs circles around your feet with a toy truck, yelling, "beeeeeep, beeeeeep!" Oh wait, is that just my house?
Related Posts with Thumbnails